Showing posts with label carrots. Show all posts

Monday, June 14, 2010

Harvest Monday: June 14, 2010


It's been a long time, since I've posted anything on Harvest Monday. (Even though I've been harvesting all year.) Mostly I've been getting lots of lettuce, artichokes, broccoli, peas, cilantro, mint, and, now, carrots. Over 2.5 lbs and there are still lots more in the ground. I've been cooking them up in a simple recipe that my husband loves:

Honey Glazed Carrots

Ingredients

  • Salt
  • 1 pound baby carrots or chopped carrots
  • 2 tablespoons butter
  • 2 tablespoons honey
  • 1 tablespoon lemon juice
  • Freshly ground black pepper

Directions

In a medium saucepan, bring water to a boil. Add salt and then carrots and cook until tender, 5 to 6 minutes. Drain the carrots and add back to pan with butter, honey and lemon juice. Cook until a glaze coats the carrots, 5 minutes. Season with salt and pepper.

Thursday, June 3, 2010

Tomatoes, carrots, and strawberries

These strawberries (Eversweet) are a big hit with any kid who comes over to my house. They are an everbearing variety that I picked up at OSH for $1 on a whim. These 10 plants have produced over 3 lbs so far this year. Although the number is probably somewhat higher in actuality, due to the aforementioned kids :) I'm using the upside-down strawberry crates and wooden/concrete blocks as a place to prop the developing berries upon. Since we've had so much rain this spring, I didn't want them to rot in all the water. I thought about planting them on "hills", like the commercial growers do, but I wasn't sure how to make that happen exactly in a raised bed. This method seems to be working ok. I just prop a couple of berries up when I walk by.

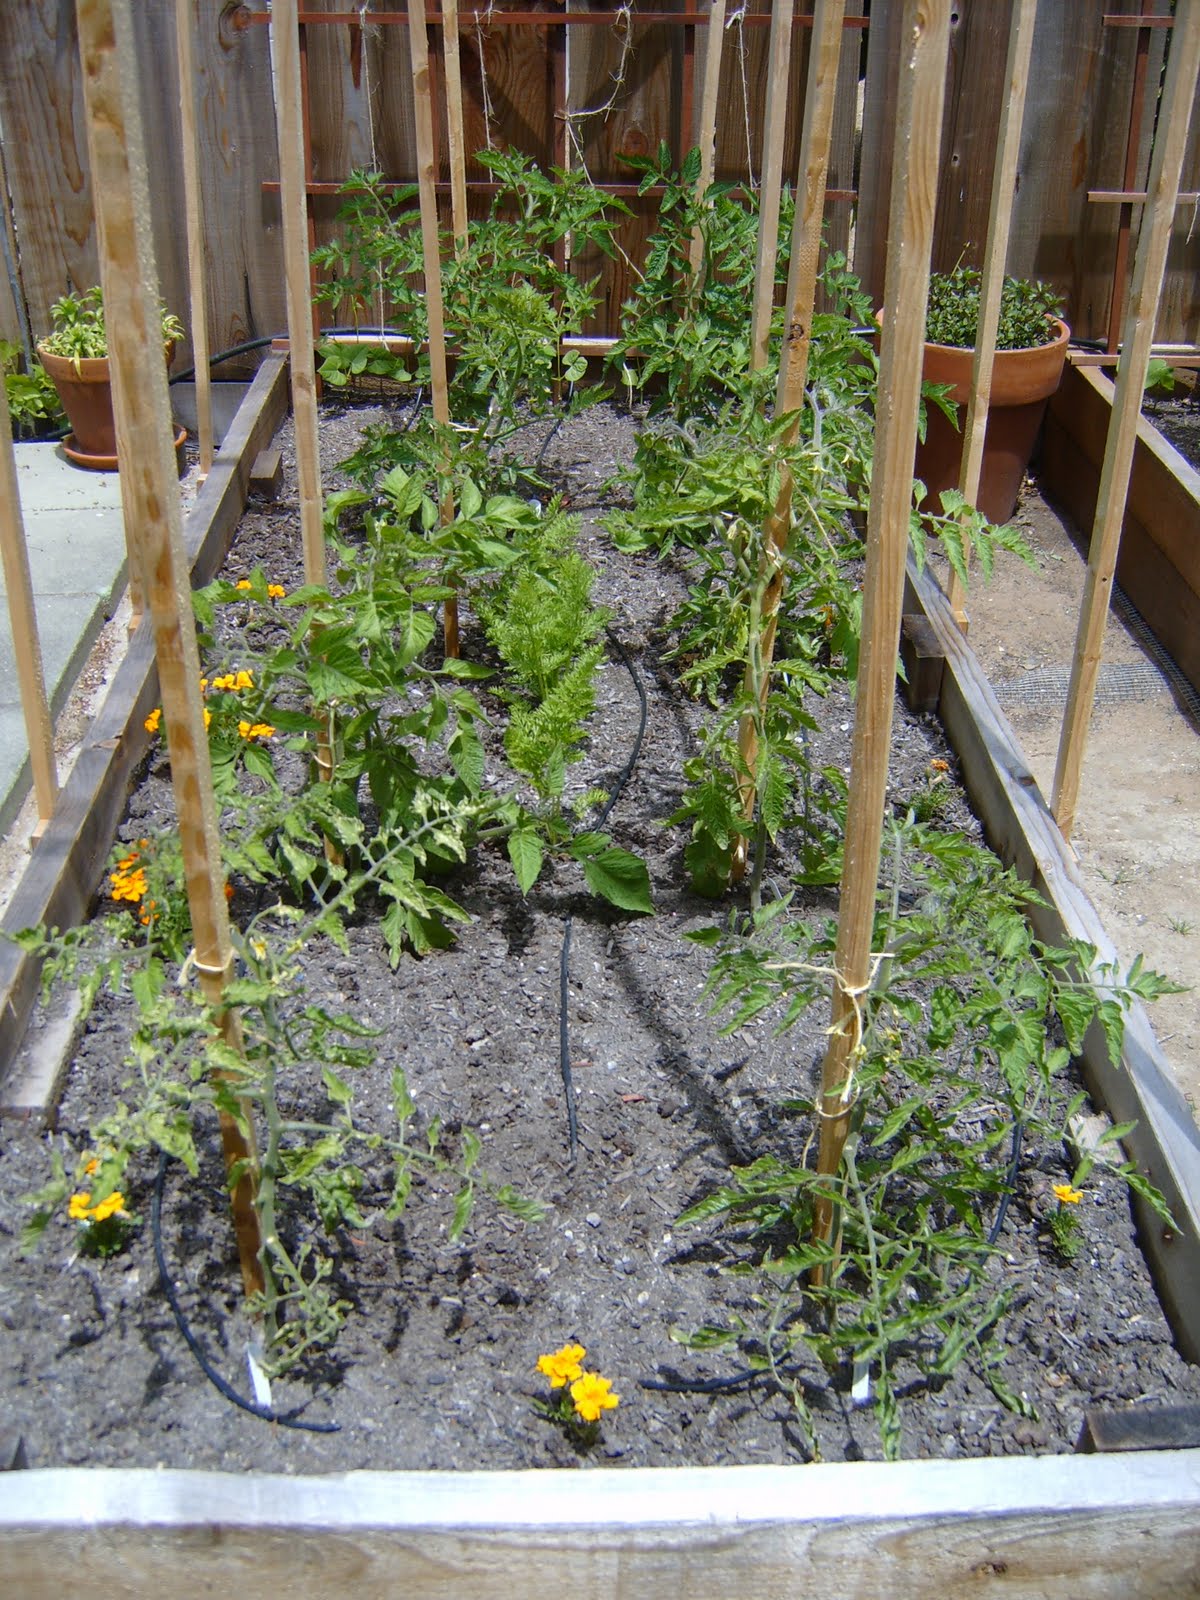
This bed is currently holding beans at the very back, then tomatoes, then tomatillos, then basil, amaranth (from Michelle, for greens), and one Greek oregano plant at the front. Again, I'm using the plastic strawberry crates to keep the birds from damaging young seedlings. The other crop which I squeezed in is carrots - you can see them in a straight row down the center. They were planted like this in February, since I knew that tomatoes and tomatillos would be going in on the edges later in the spring. It's worked out well planting them this way because they will be ready to pull before the tomatoes shade them out.


This bed has (again) beans in the back, then 8 more tomatoes, with a few carrots in the center. I'm also using marigolds around the tomatoes because they are supposed to ward off aphids. This is the second year in a row that I have done this. And although I see a few aphids, they haven't been a problem for me. Maybe it's working?!

Last year I picked the first ripe tomato on July 4. I doubt that it will be so early this year, since we've had such a cool, wet spring. But that's ok, the plants are growing well and we'll have tomatoes at some point this summer. I'm still eating dried tomatoes from last year, so we are definitely not destitute and tomato-less, yet!

Thursday, January 28, 2010

Who needs carats when you've got carrots?

Sorry for the cheesy title. I couldn't resist.

You know, there is nothing better to do on a gray afternoon in January than pull carrots out of the ground. Nope. Nothing better. It's like digging for buried treasure...in your backyard. That's what I did this weekend. Most of the carrots, which were all planted last fall, turned out medium-sized...a few were tiny and a couple were bi- or trifurcated. But then there was "Big Papa", the fattest one I've ever seen:
0.43 lbs worth of carroty-goodness on the far right

I'm planning to plant a whole lot more carrots next fall, so I can be even more rich next January.

Wednesday, December 9, 2009

Easy homemade lemon drop lotion

First of all, I apologize for another non-gardening post. The reality is that I'm just not out in the garden lately...too cold and dark. But I did manage to pull a few carrots for dinner:
Anyway, the main topic of this post is the fabulous homemade lotion that I just made:

I'm calling it lemon drop lotion, since I seem to be obsessed with all things citrus lately. The best thing about it is just how easy it is to make. The recipe has been passing through the blog-o-sphere recently with various modifications as it travels. I saw it on A Sonoma Garden. My version is below:

Ingredients:
1 1/4 cup hot water
1/4 cup emulsifying wax
1/4 cup olive oil
24-36 drops organic lemon essential oil (it can be any scent)
containers for lotion...the recipe makes 1 1/4 pints

I purchased the emulsifying wax (1 pound for $6.50) and organic lemon essential oil (1/2 oz. for $5.75) at Mountain Rose Herbs. This is enough to make more than a dozen half-pints of lotion...which makes it less expensive than even store brand lotion!

Directions:
1) In a large (at least 2 cup) glass measuring cup combine the olive oil and emulsifying wax and microwave for 1 minute until melted.
2) Then microwave 1 1/4 cup water for 1 minute in a separate container.
3) While that is heating up, add the essential oil into the melted wax/olive oil mixture and stir.
4) Next, pour the hot water into the wax/olive oil mixture and watch it turn milky white.
5) Then pour the hot lotion into a container(s) and let cool overnight. Poof! Homemade lotion with no weird or scary ingredients!